Many online videos are available on woodcarving. People enjoy watching Ian's videos because they show the techniques step by step. His videos are delivered in downloadable video files, and include photographs and plans. All purchasers must be in a position to view MPG videos. In addition to his video tutorials, he also has books available that teach you how to carve various materials. Ian Norbury's Fundamentals of Woodcarving is an example.
Woodcarving Fundamentals
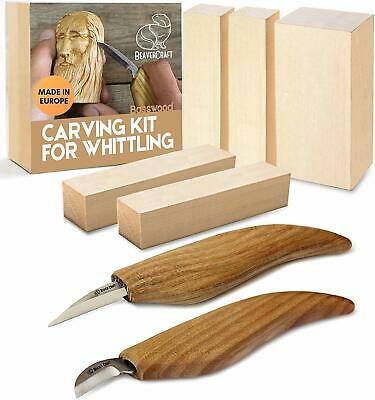
If you are new to woodcarving, you may find it helpful to consider taking a fundamentals class. This class will teach you the fundamentals of carving and is tailored to the level of experience of each student. You will learn about safety, tools, wood, finishes, and the fundamentals of woodcarving before diving into more advanced techniques. In this class, you will learn how to carve a human face, eagle, or Christmas ornament, among other subjects. You will also learn about the grain direction and clever ways to remove wood cleanly.
If you've always wanted to learn how to carve flowers or fruit, you might be interested in taking a woodcarving class. If you have a natural talent, it's easy to learn the basics. No matter what level you are at, you can learn the basics and design process in an enjoyable and relaxed atmosphere. Woodcarver and thirty-year veteran can tell you that woodcarving's foundation is finding a teacher who can help you become a master woodcarver.
Ian Norbury
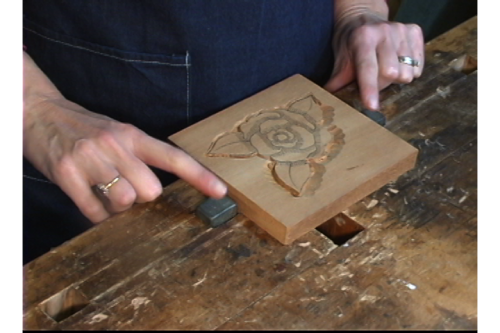
Ian Norbury's woodcarving videos are like peering over the shoulder at a master carver. Each video shows you the steps and demonstrates the techniques that Ian Norbury has mastered over fifty years of woodcarving. These videos include detailed instructions and a money-back guarantee. You can download them anytime, anywhere and as many times as necessary.
The DVD can either be used as a reference or as an instructional tool. These videos provide step-by-step instructions as well as clips of Ian Carving. The entire process can be seen from start to finish. Ian's teaching methods are easy to understand. He shows how to carve an harlequin and how to draw a character out of a myth. There are more than two hours of instructional videos available, each one able to help you improve.
Frank Russell
Frank Russell's videos on woodcarving will benefit beginners and intermediate carvers alike. His techniques can be used to carve animals, birds, or plants. He also demonstrates how to clean and shape bits. These videos demonstrate how to carve and provide both visual and technical information. Frank Russell's videos also can be streamed online or on DVD. Fur, Feathers or Fins will provide a comprehensive guide for carving birds of all kinds.
Frank Russell's Woodcarving Videos are an excellent resource for advanced and beginner carvers. These videos have detailed instructions for both beginners and advanced carvers. These videos were shot with Foredom Woodcarving Kits. They feature a variety tools including Typhoonburs, CeramCut Blue abrasive point and many other tools. This series also features a Cotton Tail Rabbit carving clip.
Scott Phillips
If you're looking for more information on woodcarving, you may want to watch Scott Phillips woodcarving videos. Scott and his woodcarving skills are featured in the PBS series "American Woodshop." Scott shares his woodcarving journey, including the time when he used his father’s walnut boards. He also discusses how his love of baseball inspired his first jewelry box. Scott is also known for his woodcarving videos. He has written a book about the history and evolution of the shuttle program. His upcoming book, "Remove Before Flight" will also detail the history of this program. Even though his woodcarving career is now well-established, he still builds occasional Adirondack chairs and clocks.
Kevin Coates
Kevin Coates has some great videos for woodcarving if you like carving. He has over seven million YouTube views and nearly 26,000 subscribers. Many carvers are inspired by his videos to create woodcarving videos. You can watch them to see how you can carve your own piece. These videos showcase carvings by Kevin Coates as well other well-known carvers. These videos are sure to inspire you.
FAQ
Which wooden items are very popular?
These wooden products are the most popular. They were made from sustainably harvested wood.
Most furniture is made from oak, maple, mahogany or walnut.
These woods are extremely strong but also have beautiful colors and grain patterns. If they are well cared for, they can last many years.
To protect wood furniture from moisture damage, it should be painted first. All surfaces should be painted, including doors, drawers, and handles.
Choose a paint with water resistance if you want furniture to last as long possible.
A high-quality oil-based primer should be used, followed by two coats with top coat. Depending on how often it will be worn, you may need to apply several coats.
Avoid spray cans and aerosol paints. These products can evaporate quickly and emit harmful fumes.
Where can you buy hardwood lumber?
Home Depot has hardwood lumber for sale. They carry a variety of wood products such as flooring, cabinets, and furniture.
There is also a wide selection of engineered hardwoods, including Ipe (Araucaria Angustifolia), Brazilian Cherry(Pau d'Arco), Mahogany (Swietenia Mcrophylla).
You can find these woods for sale online by searching "hardwood lumber" on Google.
What kind of tools are used to carpenters?
Carpenters use a hammer as their most common tool. The hammer is used to pound nails into wood. They can also use it to hold the pieces together as they work on a project. Other tools include clamps, pliers, screwdrivers, measuring tape, pencils, saws, drills, and wrenches.
How do I organize my shop?
The first step toward keeping your workshop clean and organized is to set aside a designated area for storing tools. Your tools will stay sharp and ready to go when they are free from dust and debris. Use pegboard hooks to hang tools and accessories.
How do you calculate woodworking prices?
The most important thing to remember when calculating costs for any project is to keep them as low as possible. You should always try to make sure that you are getting the best deal on materials. It's also worth taking into account all the other factors that may affect the cost of your projects, such as time, skill level, and experience. Check out our guide on the average cost of common DIY projects to get an idea of how much you can spend on woodwork projects.
What woods are suitable for making furniture?
Woods can be classified according to how hard they are. Softwoods include cedar, pine, cedar, and Cypress. Because they resist rot, softwoods can be used to make outdoor furniture. These hardwoods include maple, mahogany and teak. They are generally indoors as they don't weather well outside.
How long does it take to finish a piece of furniture?
It all depends upon the size of your piece of furniture. A smaller project like picture frames or boxes can be completed in a single day. Larger projects, like desks or dining tables require several days. It takes time and effort to properly stain the wood.
Statistics
- The best-paid 10 percent make $76,000, while the lowest-paid 10 percent make $34,000. (zippia.com)
- If your lumber isn't as dry as you would like when you purchase it (over 22% in Glen Huey's opinion…probably over 10-15% in my opinion), then it's a good idea to let it acclimate to your workshop for a couple of weeks. (woodandshop.com)
- The U.S. Bureau of Labor Statistics (BLS) estimates that the number of jobs for woodworkers will decline by 4% between 2019 and 2029. (indeed.com)
- Average lumber prices rose about 600 percent between April 2020 and May 2021. (familyhandyman.com)
External Links
How To
How to stain wood
Staining wood is the process of applying chemicals to the wood's exterior, which alters its color. The wood will turn from white to brownish-red due to the chemical reaction. Oak is the most common wood type for staining. However, you can also use other wood types.
There are several ways to apply stains to wood surfaces. One method involves mixing the stain and a solvent and then spraying it on the wood. Another method involves applying a solution of water to the wood. It is possible to mix stain into varnishes and paints, making it part of the finishing coat.
Preparing your wood for staining is the first thing to do. Cleaning the wood thoroughly removes any dirt or grease that could interfere with applying the stain. Sanding smoothens any scratches or rough spots. The next step is to determine the type of stain you would like to use. Penetrating stains are different from non-penetrating. Penetrating stains penetrate deeper than non-penetrating stains, which makes them great for dark colors like mahogany. Penetrating stains are best paired with lighter colors, such as maple.
After you've decided what type of stain to apply, get ready for your tools. Paintbrushes are great for applying stain because they allow you to evenly spread the liquid across the surface. It is a good idea to have rags on hand in case you need them to clean up any stains that may remain after you have finished painting. If you are planning to mix your stain, ensure you have enough containers for each component.
After you have prepared your materials, clean the area you intend to stain. Clean the area with soap and warm water to get rid of dirt and grime. Wipe the entire piece of furniture with a rag dampened with clean water. Make sure you eliminate any loose debris, especially if you plan to stain darker wood.
Apply the stain next. Next, apply the stain to the furniture by starting at one end. Move slowly and carefully along the grain of your wood until you reach its opposite end. Make sure that the stain does not drip off the edge of the wood. Before you proceed with the next steps, let the stain dry completely.
Apply a clear polyurethane sealant to protect the painted surface. Apply three coats with polyurethane. Allow the third coat, which should dry overnight, to dry before sanding.