The fascinating history of fretwork dates back to the mid-16th-century. We'll be looking at the origins of fretwork, how it was influenced by architectural periods, common elements, and the techniques used. You can read on to learn more. Do not forget to bookmark this page so you can refer back in the future! Here's a brief overview of the history of fretwork:
Patterns from diverse origins
The history fretwork goes back nearly 3000 years. It started as Egyptian furniture taken from sealed tombs. This art form was introduced to the rest the world, and it has since become a standard in modern decor for both floors and walls. The patterns of different origins are often found in a variety of materials, including wood, metal, or stone. Below are some of the most prominent origins of fretwork.
The 12th century saw the development of the trellis. It was originally used to shade the interior of a building from the harsh rays of the sun and to promote air circulation. Many designs derived from Islamic geometric patterns have found their way into modern interior design. A few of these patterns have been used in decorative elements of Edwardian and Victorian architecture.
Influences of architectural periods
Style and form of fretwork are affected by both the period that fretwork originated from, as well a general period in architecture. Modernism ushered in a new style of architecture that was free of ornament, but bound by a universal language. This period was the beginning of postmodernism. A style that reflects and echos the past styles, it was called postmodernism. Modernism was a fundamental shift in architecture. However the influence of this period on fretwork design style and design was not complete.
Architecture's history is almost as old as humanity itself. While different styles evolved in different places, they are also indicative of how societal needs and climates changed. Different architectural styles emerged from different periods and often reflect the changing climate and landscape. Architecture has evolved from new ideas and improved construction techniques throughout history. These movements helped define artistic trends across the globe.
Common components

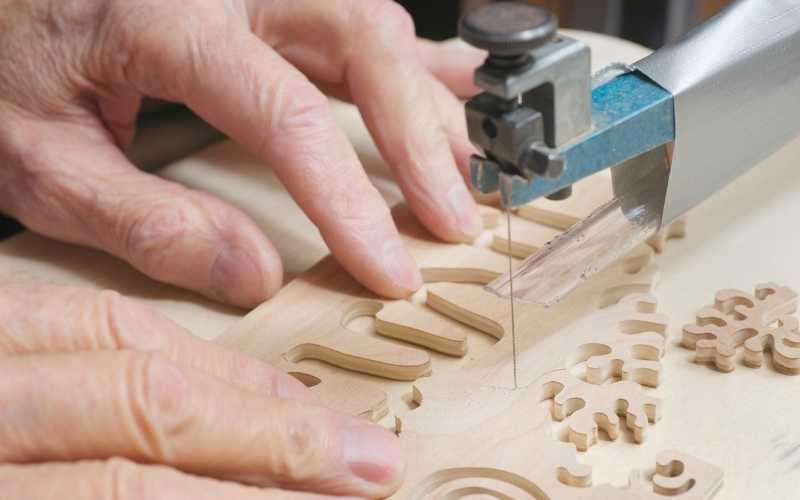
The history of fretwork dates back as far as human civilization. This ornament has been in use for many years. It is believed that fretwork was created in Greece and named after its geometrical design. Frets were used by the Greeks to decorate pottery and paint, and also in building and other structures. Fretwork can be made in geometrical patterns. Victorians used the treadle lathe and the scroll saw to make fretwork.
While Spain was occupied by many Moors during the early Gothic period (the Moors occupied most of Spain), their designs influenced Spanish art and Spanish decoration. As the result, fretwork is the oldest decorative art in the world. This amazing history dates back to prehistoric times. The earliest known examples of fretwork date from the 12th-century. The history of fretwork, however, is far more complicated. The Renaissance's architecture and decoration were also greatly influenced by the Moors.
Techniques
While it's possible to find articles on fretwork in national or international publications, you can't necessarily count on them being unbiased. There are however many resources that will assist you in making an informed decision. Here are three great examples. Let's begin with the first. D. Denning wrote a book on fretwork. He also explains the history of marquetry and how to do it. It also provides instructions for overlaying, inlaying and scroll sawing.

First, fretwork was discovered on Egyptian furniture. This was taken from their closed tombs. It has become an important part of modern decor and spread throughout the world. It is widely used today on walls and floors. The examples below will help you learn more about this stunning and original design. These techniques are quite old! And, of course, you'll love that they're still used today.
FAQ
Do I have the potential to make a decent living doing this?
Yes! In fact, many woodworkers already do. According to the U.S. Bureau of Labor Statistics' (BLS), in May 2012 the median annual wage of woodworkers was $34,000 This is more than the national average of 31,000 per annum.
Where do I start with woodworking?
Building furniture is the best way to learn how furniture is made. While you will need tools and make mistakes, you will eventually master the art of building furniture.
Begin by choosing the project that you want to finish. You could make something as simple or complex as a box. Or you could build a whole entertainment center. Once you've settled on a project find a local skilled woodworker. Ask him or her for advice on what tools you'll need and where to find them. Perhaps you could ask if there is someone else who does this type of work.
Which wooden items are very popular?
Most wooden items that are best-sellers are made from wood harvested sustainably.
Maple, cherry, mahogany walnut, teak, mahogany and maple are the most common woods for furniture.
These woods not only have great strength, but also beautiful patterns and colors. They will last for many years, if taken care of properly.
To prevent moisture damage, wood furniture should always first be painted. This applies to all surfaces, even drawers and doors.
Paint that is water-resistant will ensure furniture lasts for a long time.
A high-quality oil-based primer should be used, followed by two coats with top coat. It is possible to apply multiple coats depending on how heavy the wear.
Spray cans or aerosol paints should be avoided. These products contain solvents that evaporate quickly and leave behind harmful fumes.
What is the average time it takes to finish furniture?
It all depends on how large the furniture is. Smaller projects like boxes and picture frames can be finished within one day. Larger projects such as tables and desks can take several days to complete. It takes time for the wood to be stained and sealed properly.
Statistics
- In 2014, there were just over 237,000 jobs for all woodworkers, with other wood product manufacturing employing 23 percent; wood kitchen cabinets and countertop manufacturing employing 21 percent. (theartcareerproject.com)
- Woodworkers on the lower end of that spectrum, the bottom 10% to be exact, make roughly $24,000 a year, while the top 10% makes $108,000. (zippia.com)
- The U.S. Bureau of Labor Statistics (BLS) estimates that the number of jobs for woodworkers will decline by 4% between 2019 and 2029. (indeed.com)
- If your lumber isn't as dry as you would like when you purchase it (over 22% in Glen Huey's opinion…probably over 10-15% in my opinion), then it's a good idea to let it acclimate to your workshop for a couple of weeks. (woodandshop.com)
External Links
How To
How to join wood with no nails
Woodworking is a favorite hobby. You can make useful items from wood with your hands, which is both relaxing and fun. There are times when two pieces of wood need to be joined together. This article will teach you how to do this to keep your woodwork projects looking great.
Before joining the pieces of wood together, you will need to first trim any edges. Sharp corners can cause problems down the line. After you have completed this step, you are ready to glue your boards together.
When working with hardwood, glue should be applied only to one side. If you are using softwoods such pine or cedar, glue should only be applied to one side. Once you have applied the glue, press down on the boards until they are fully attached. Before moving onto the next step, make sure the glue has dried completely.
Once you've glued your boards together you will need to drill holes in the joints to accommodate screws. These holes will differ depending on the type and size of screw you are using. For example, if you intend to use 1/2-inch wood screws, you need to drill a hole that is at most 3/4 inches deep.
Once you've drilled your holes, you'll want to drive the screws through the joint and into the backside of the board. Avoid hitting the board's top surface. Otherwise, you could ruin the finish. Avoid hitting the screws' ends too often when driving screws. This will avoid splitting in the wood's ends grain.
Now that your project is finished, you'll want to protect it from the elements. You can either cover the entire furniture or just the top. It doesn't matter what method you use, you want something that will last many years. Examples include oil-based varnishes and polyurethanes, shellac, lacquer and others.
These products can generally be found in any home improvement shop. Make sure you get the right product for your job. Don't forget to keep in mind that some finishes are toxic. When handling certain finishes, wear protective gear.